
In the last part of this tutorial we started with our theme with just two files: index.php and style.css. What we got was a terrible looking website that looked like a notepad text editor. In this part we are going to style our theme to give it a professional look.
Below is what it is going to look like.
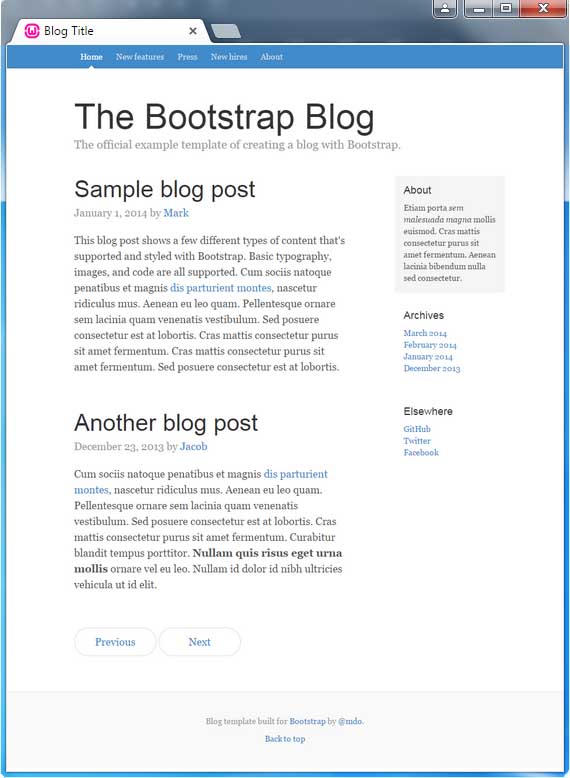
For this we are going to use Twitter Bootstrap CSS file that we downloaded in previous tutorial. And yes, the above template is taken from readily available Bootstrap template on below url.
http://getbootstrap.com/examples/blog/
Of course, we have modified it a little bit to keep it simple. Below is the html markup
Blog Title
The Bootstrap Blog
The official example template of creating a blog with Bootstrap.
Sample blog post
This blog post shows a few different types of content that's supported and styled with Bootstrap. Basic typography, images, and code are all supported. Cum sociis natoque penatibus et magnis dis parturient montes, nascetur ridiculus mus. Aenean eu leo quam. Pellentesque ornare sem lacinia quam venenatis vestibulum. Sed posuere consectetur est at lobortis. Cras mattis consectetur purus sit amet fermentum. Cras mattis consectetur purus sit amet fermentum. Sed posuere consectetur est at lobortis.
Another blog post
Cum sociis natoque penatibus et magnis dis parturient montes, nascetur ridiculus mus. Aenean eu leo quam. Pellentesque ornare sem lacinia quam venenatis vestibulum. Sed posuere consectetur est at lobortis. Cras mattis consectetur purus sit amet fermentum. Curabitur blandit tempus porttitor. Nullam quis risus eget urna mollis ornare vel eu leo. Nullam id dolor id nibh ultricies vehicula ut id elit.
Copy and save the above code in index.php
Assuming you have already downloaded bootstrap files, search for bootstrap.min.css in the downloaded zip file. Usually it is in bootstrap-{version-no}-dist/css directory as shown here. Create a directory css in our theme folder and copy it in this folder.
Now view your website. You should see something as below.
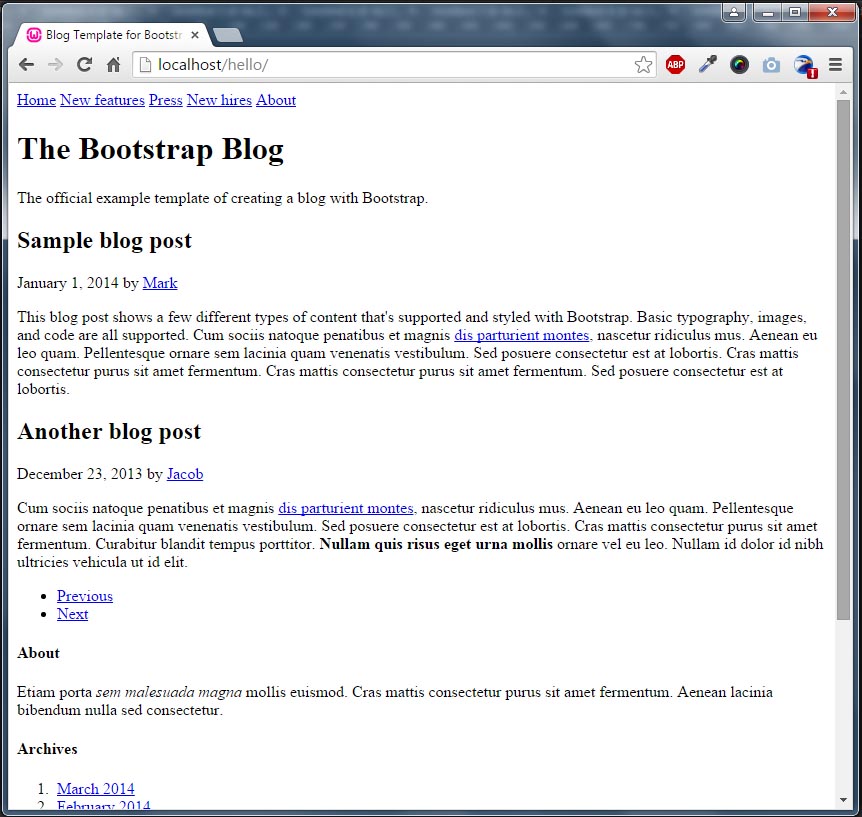
Now as you guessed this is because the browser is unable to pick up the correct path to our stylesheets. Reason being we have used a relative path. So lets go ahead and fix it. Replace the below line in head tag
with below code
What we have done here is replaced the relative path ../../dist/css/bootstrap.min.css with get_template_directory_url() which is a WordPress function. What it does is return the url to active theme. So in our case it will return http://localhost/wordpress/wp-content/themes/perials. To this we append /css/bootstrap.min.css since our bootstrap.min.css is located not in the hellotheme folder but in the hellotheme/css folder.
With the same logic, change the path to blog.css with the below code
blog.css should be placed in same directory as bootstrap.min.css. You can download it from here
Once you replace and save the above you should see something like below.
Now the next step is to change the static content to the current page content. To do this we’ll be using the WordPress loop. Observe the markup contained in div class="blog-main". There are two occurrences of it, one for each blog. The div with blog-post-title class (div class="blog-post-title") contains the post title and one with blog-post-meta contains the publish date of the post. The p tag following it contains the post content. Now instead of hard-coding the content in the index.php file itself we’ll do it dynamically. That is we’ll let WordPress do it for us by using some of its functions. So replace the two divs having below code
Sample blog post
This blog post shows a few different types of content that's supported and styled with Bootstrap. Basic typography, images, and code are all supported. Cum sociis natoque penatibus et magnis dis parturient montes, nascetur ridiculus mus. Aenean eu leo quam. Pellentesque ornare sem lacinia quam venenatis vestibulum. Sed posuere consectetur est at lobortis. Cras mattis consectetur purus sit amet fermentum. Cras mattis consectetur purus sit amet fermentum. Sed posuere consectetur est at lobortis.
with this
Sample blog post
This blog post shows a few different types of content that's supported and styled with Bootstrap. Basic typography, images, and code are all supported. Cum sociis natoque penatibus et magnis dis parturient montes, nascetur ridiculus mus. Aenean eu leo quam. Pellentesque ornare sem lacinia quam venenatis vestibulum. Sed posuere consectetur est at lobortis. Cras mattis consectetur purus sit amet fermentum. Cras mattis consectetur purus sit amet fermentum. Sed posuere consectetur est at lobortis.
We have wrapped the markup in if ( have_posts() ) { while ( have_posts() ) { the_post(); . This is nothing but the WordPress loop. What it does is process each post to be displayed on the current page. So say on a WordPress page it will process the data for singular page, on a Post it will process data for the particular post and on an Archive page it will repeat itself for each post. The loop will display following information by default for each post
the_title()
the_time()
the_content()
There are many other functions that you can use inside the loop to retrieve information (say featured image, categories, tags etc) for a particular post. The above ones are purposely listed since we are going to use them now.
Replace the below line of code
Sample blog post
with
We have replaced Sample blog post with the_title. This function will return the title of the current post in the loop.
Replace the below line of code
with
We have replaced January 1, 2014 with the_time. This function will return the published date of the current post in the loop.
Replace the below line of code
This blog post shows a few different types of content that's supported and styled with Bootstrap. Basic typography, images, and code are all supported. Cum sociis natoque penatibus et magnis dis parturient montes, nascetur ridiculus mus. Aenean eu leo quam. Pellentesque ornare sem lacinia quam venenatis vestibulum. Sed posuere consectetur est at lobortis. Cras mattis consectetur purus sit amet fermentum. Cras mattis consectetur purus sit amet fermentum. Sed posuere consectetur est at lobortis.
with
As you guessed the_content() will return the content, the one that you type in WYSIWYG editor, for the current post in the loop.
We’ll now move away from the loop.
The Bootstrap Blog
Replace above line with
Similarly below line
The official example template of creating a blog with Bootstrap.
needs to be replaced with
We have now replaced the The Bootstrap Blog with the site title and the tagline with the WordPress site tagline.
We’ll now replace the navigation menus with our WordPress pages. Replace the below code in index.php
Home
New features
Press
New hires
About
with
post_title; ?>
get_pages returns an array of pages of your WordPress blog. What we do in above code is to loop through this array to generate the markup for our navigation menu.
Below is how the index.php should finally look
Blog Template for Bootstrap
Thats all for now. In next part we’ll have a look at how to create the sidebar using widgets. Stay tuned.
Hi
Thanks for the great tutorial so far, well explained and clear.
I’ll wait for the next part.
greetings Zenny