
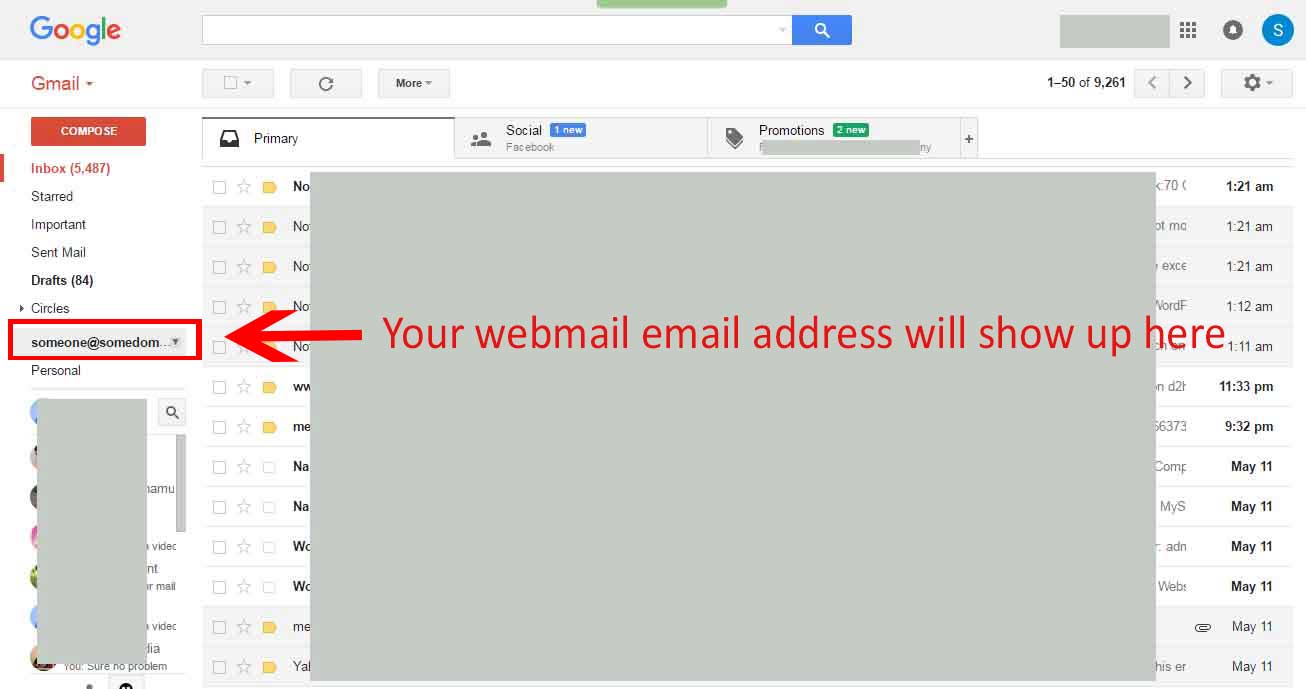
Let’s say you have an email address like someone@somedomain.com. And you are using webmail (webmail.somedomain.com) or Outlook to manage your emails. This article will teach you how you can use Gmail to manage your ‘someone@somedomain.com’ email address. You’ll need to have a personal Gmail account. At the end of this tutorial you’ll have something like below in your Gmail account.
So using your personal Gmail account you’ll be able to send mail from someone@somedomain.com as well as receive all emails for someone@somedomain.com. Note that emails will though be actually sent and received through your hosting’s SMTP server.
Below are the steps:
Step 1: Login to your Gmail Account.
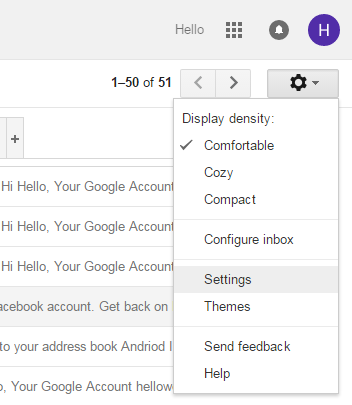
Step 2: Click on the Settings Cog icon and go to Setting in the drop down.
Step 3: Click on “Accounts and Imports” Tab

Step 4: Click on “Add a POP3 mail account you own”
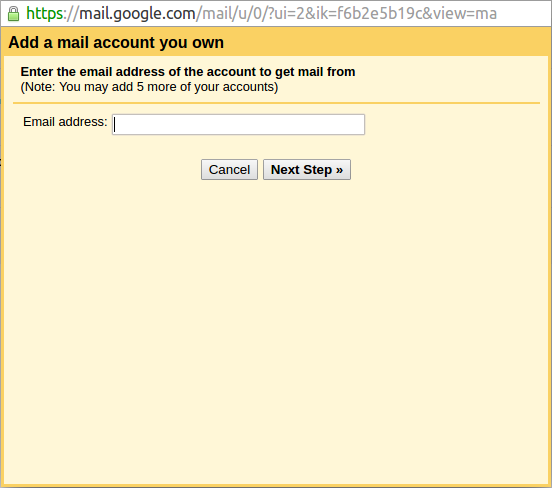
Step 5: Enter the email address you wish to configure and Click on Next
Step 6: Enter the email setting
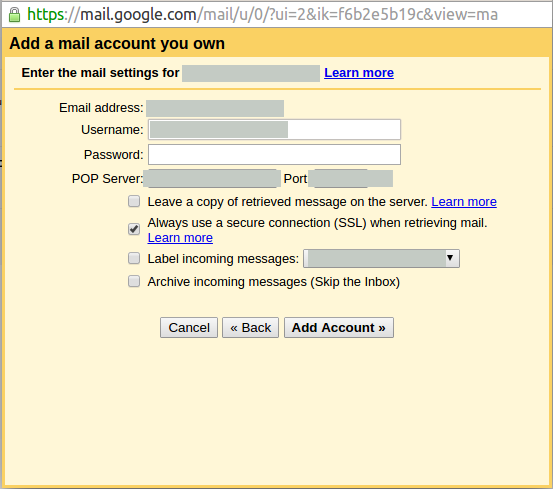
Click on “Add Account”.
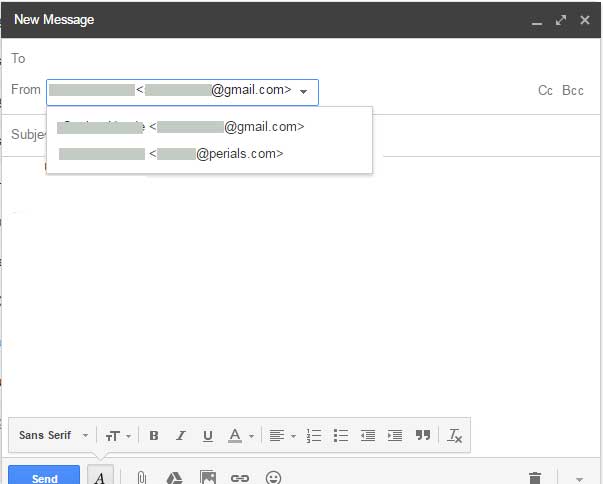
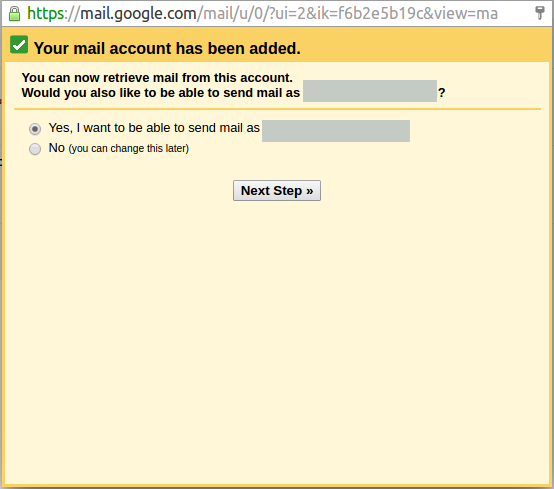
Step 7: Select “Yes, I want to be able to send mail as XXXX”. Click on Next
Step 8: Enter Name. You may uncheck the “Treat as an alias” for now. Learn more about this at https://support.google.com/a/answer/1710338

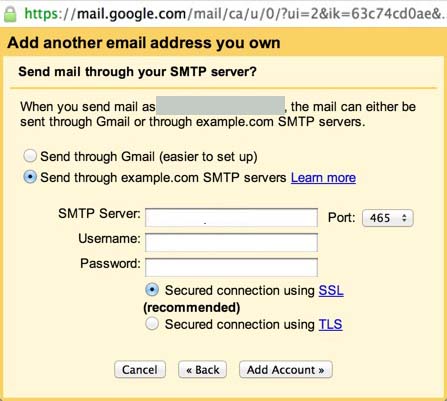
Step 9: Select “Send through xxx SMTP servers”
That’s it. Gmail will now fetch all your back dated mails into your Gmail account and label them someone@somedomain.com as shown in first figure. As of writing this mail Gmail allows you to add 5 email addresses